Surprising Ways to Unclog Your Drains
- By Admin
- •
- 14 Mar, 2017
- •
This is a subtitle for your new post
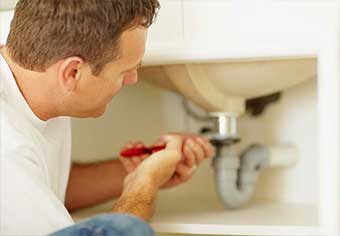
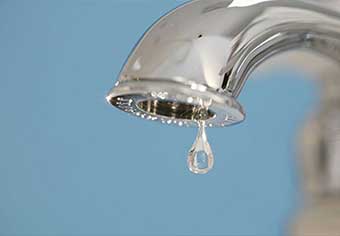
Few things are more uncomfortable than standing in a tub full of dirty water as you shower because your drain is clogged. As most women with long hair know, clogged shower drains are actually a pretty common problem. While plumbers are certainly the most sure-fire way to unclog your drains, there are some things you can try before you call for professional help.
Boiling Water
One of the easiest (and most unexpected) ways to unclog your drain is with boiling water. If your drain clog isn’t very extreme, boiling water may be all you need to get it fixed. Pour the boiling water down your drain and next time you shower, you’ll be amazed to find that your drain is no longer clogged.
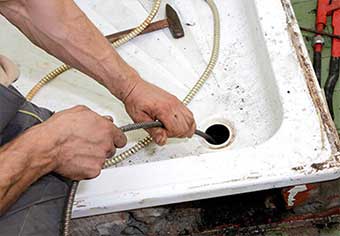
Bent Wire Hanger
Sometimes unclogging your drain is as simple as sticking a bent wire hanger down there and digging out any hair, dirt or debris that may be preventing water from draining. This method is as easy as it sounds; find an old wire hanger, bend it so that it will fit down your drain, and start digging.
You’ll probably be surprised at how much you’re able to dig out from your clogged drain. Even if you make a conscious effort to keep your showers clean, it’s nearly impossible from keeping some things from slipping down the drain and getting stuck. Luckily, this method is cheap, effective and very fast.
Baking Soda and Vinegar
When it comes to cleaning, is there a better duo than baking soda and vinegar? These two, when used together, can be just as powerful as most cleaning products. The good news about this method is that it will probably cost you a lot less than drain unclogging products that you can find at the store.
Using baking soda and vinegar to unclog your drains takes very little time and effort. Simply pour dry baking soda down your drain and then follow it up with vinegar. Allow this mixture at least 30 minutes to an hour to sit and work its magic. Once it’s been sitting for long enough, rinse the drains out with hot water and your drains should be as good as new.
Dish Soap
Dish soap may not seem like an obvious solution to clogged drains, but it is actually extremely effective. To try this method, you’ll need nothing more than one-quarter of a cup of dish soap and some boiling water.
Start by pouring the dish soap down the drain and then follow it up with your boiling water. This method works because the soap acts as a lubricant and can help loosen hair and debris from the sides of your drain. Once your drain has been lubricated, boiling water should be enough to clear everything out.
Sodas
While soda may not be the best thing to put into your body, it’s actually a great thing to pour down your drain. If your drains are clogged and nothing seems to be working, try Pepsi or Coca-Cola. This method really is as easy as pouring a can of soda down the drain.
Much like vinegar and baking soda, soda is extremely effective in breaking down debris because it contains phosphoric acid. You might be surprised to find that this method works at least as well as some commercial cleaning products.
Drain Snake
If none of these methods have been effective for you, you might want to consider investing in a drain snake. Drain snakes are long, metal ropes with metal attachments at the end that can fish out anything that might be clogging your drains. While they may cost a bit of money, they are reusable; definitely a worthwhile investment!
If you can’t get one of these methods to work, you don’t want to deal with the mess or you aren’t confident in your abilities, it’s best to call a professional plumber. They will be able to unclog your drains quickly and, best of all, you won’t even have to move a finger. Next time your drains are clogged, call Plumbing Masters to see how they can help.
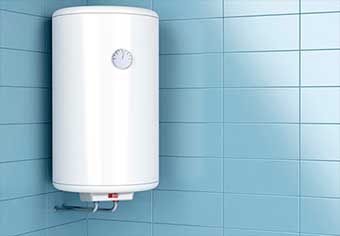
Like all appliances, water heaters have a limited service life. Knowing how long you can expect your water heater to last and when you need to replace it can help you avoid a catastrophic water heater failure. These answers to frequently asked questions can help you take care of your unit.
How Long Do Water Heaters Last?
Most water heaters last about 8 to 12 years if properly maintained. Homeowners who keep their water heater longer than this time run the risk of a water heater failure that could result in a flood in the house.
What Can You Do to Make Your Water Heater Last Longer?
Most water heaters need minimal maintenance throughout the year. However, homeowners with hard water can extend the life of their water heater by installing a water softener. Water softeners can prevent scale buildup inside the water heater, thus helping to preserve the efficiency of the unit.
Inspecting your water heater on a regular basis can help as well. When inspecting your unit, look for signs of rust, corrosion, moisture damage, or water stains on or around the water heater. If you see any of these signs, contact a plumber right away.
Some homeowners protect and preserve their water heater by draining the sediment regularly from the bottom of the tank. Draining the sediment can prevent the water heater from working harder than necessary to do its job.
To do this task, turn off the power to the unit as well as the water supply to the tank. Then follow these steps:
- Turn on hot water in a bathroom or kitchen sink to prevent a vacuum from forming in the pipes.
- Hook a hose up to the spigot on the bottom of the tank.
- Open the spigot.
- Let the dirty hot water at the bottom of the tank drain into a bucket. Be careful at this stage because the water may be very hot.
- Empty the bucket periodically.
When the water runs clear, the tank has been drained of sediment. When the process is finished, turn off the spigot on the water heater, then turn on the cold water valve leading to the water heater to refill the tank. Once the tank is filled, turn off the hot water faucet in the house and restore power to the water heater tank.
The sediment should be drained on an annual or bi-annual basis. If the home has very hard water, it should be performed even more often.
Is Your Water Heater Nearing the End of Its Service Life?
If you're not sure how much life your water heater has left in it, there are some signs you can look for that it's nearing the end of its usefulness. Your water heater may develop a small leak or corrosion around the top edge of the tank. It may also lose efficiency or be unable to heat water as well as in the past.
How Can You Tell How Old Your Water Heater Is?
Many modern water heaters come with stickers that give the date that the water heater was manufactured. Some water heater manufacturers simply encode this information into the serial number. If you cannot find a sticker with the date on the water heater, look in the owner's manual to decode the serial number, or contact the manufacturer for help.
Is It Possible to Replace a Water Heater as a DIY Project?
Although a water heater may be replaced by a knowledgeable DIYer, it's best to contact a professional. Hooking up your water heater incorrectly could result in a flood or could even cause damage to the new tank.
Who Can You Call For More Information in Cocoa, FL?
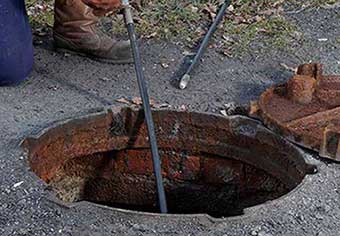
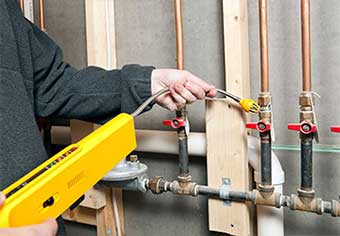
Clogged drains can be a huge inconvenience and disrupt your everyday routine. If left unchecked, a clogged drain can lead to overflowing water fixtures and water leaks, causing damage in your home that can be expensive and complicated to fix. There are two main methods that a plumbing professional can use to clean out your drains: hydrojetting and drain snaking.
Both methods of drain cleaning perform the same function, but they are best suited for different problems and different contexts. Understanding what each process is best suited for can help you figure out which drain cleaning service you should talk to your plumbing professional about.
Drain Snaking
Drain snaking refers to the process of putting a thick, long metal wire, usually with some sort of attachment at the end, down your pipes. The wire is then pushed into the blockage multiple times, and the attachment at the end will help pull apart the blockage, allowing water to drain properly. Snakes come in multiple sizes, and can be either manually powered or attached to a motor that aids in the process.
The main advantage of drain snaking as a drain cleaning method is that it is relatively simple. A single professional can snake a drain in a matter of minutes and get your water flowing again right away.
Further, drain snakes are extremely low-impact, which means that they are not going to cause damage or wear to your plumbing. This is ideal for older plumbing systems that may be a little fragile.
However, drain snaking comes with a number of caveats. First and foremost, drain snaking can only clear a path in your plumbing that is the size of the tip of the snake. This means that more blockages could occur again soon if just a small amount of debris winds up in your plumbing.
Further, drain snakes can have trouble dealing with certain types of durable clogs in your plumbing, and may not have the power to break through. When this is the case, alternative drain cleaning methods should be explored
Hydrojetting
Hydrojetting refers to making use of a highly pressured stream of water that is sprayed in a jet down your drains. It is done at such high speeds that whatever organic debris is blocking your plumbing is blasted apart, allowing water to flow normally again.
Hydrojetting is extremely effective, and the high pressure of the water means that hydrojetting can easily clean out long pipes. Even tree roots and other stubborn blockages can be cleared. Further, the power of hydrojetting means that it can be used on larger blockages and drains, including your home's sewer drain, making it a versatile solution.
Unlike drain snakes, hydrojetting can clear away smaller pieces of gunk and buildup along the sides of your pipes, giving a deeper clean to your plumbing and drastically reducing the likelihood of more blockages creating problems in the future.
The downside of hydrojetting is that it isn't well suited for all types of plumbing. Systems with older pipes, or pipes that have recently experienced several leaks or other issues, can actually be damaged or broken by the process, creating an additional plumbing issue to fix.
Further, hydrojetting can take a little longer to get results because it requires specialized equipment and a certain amount of setup before the procedure can be performed. This means it may not be the ideal solution for smaller clogs, or when you need to get the water running again immediately.
For any questions regarding drain cleaning in your home, or any other plumbing issues you may have, you can contact us at Plumbing Masters. Our trained plumbing professionals will be happy to talk to you about your options and provide information directly tailored to your situation.
When a water heater tank fails, the result can be disastrous. Depending on the location of the water heater in the home, tank failure can cause hundreds or thousands of dollars in damage. However, performing regular maintenance on your water heater can help you keep the heater in good condition and can even help catch water heater problems before they become serious.
Inspect the Water Heater Quarterly
Inspecting your water heater on a quarterly basis is a good way to catch problems before they damage the house. When inspecting your water heater, check for the following:
- Corrosion. Corrosion on the tank or around the pipes feeding into the tank could be a sign of an impending leak.
- Soot. Soot around the electrical parts of the water heater or in the location of the pilot light could be an indication of a short or a malfunction.
- Temperature. For many water heaters, the recommended temperature setting is 120 degrees Fahrenheit. If the temperature is higher than the manufacturer recommends, the water heater is forced to work harder than necessary to do its job. This can reduce the service life of your water heater. Check the temperature of the water heater with each inspection and make changes as necessary.
If you notice anything questionable about your water heater during the annual inspection, contact a plumbing expert for help. Your plumber can help you determine whether or not your water heater is in need of repair.
Flush the Water Heater
Sediment buildup happens naturally in tank water heaters and is especially common in homes with hard water. Sediment buildup can block the heating elements in the bottom of the tank, forcing the tank to work hard to heat the water.
Some homeowners might notice a popping noise in the bottom of their water heaters. This sound is an indication that the sediment in the bottom of the water heater is roiling and broiling when the water heater is turned on.
You can flush the water heater on an annual basis to help keep this sediment out of the bottom of the tank. To drain the sediment from your water heater, do the following:
- Turn off the cold water valve at the top of the tank.
- Cut the power to the appliance.
- Open up a hot-water faucet somewhere in the house to prevent a vacuum from forming in the pipes.
- Give the water in the tank time to cool. This step is technically optional, but homeowners who choose not to do this step must be very careful to avoid serious burns.
- Thread a hose onto the spigot located at the bottom of the water heater.
- Place the open end of the hose into a five-gallon bucket.
- Turn on the spigot at the bottom of the water heater.
- Fill the bucket with water until the water runs clear. You may need to fill the bucket more than once before the water is clear.
- Carefully dump the water from the bucket.
When the water coming out of the water heater is clear, the water heater has been fully drained of sediment. When the process is finished, close the spigot at the bottom of the water heater and turn on the cold water valve at the top of the tank.
When water begins to flow freely from faucets in the house once again, this is a sign that the water heater is full. Turn on the power to the water heater and turn off the hot-water faucets in the house.
Contact Your Plumber With Any Questions
At Plumbing Masters we're happy to answer homeowner questions about water heater maintenance and other plumbing issues. To find out more about how you can take care of your home's water heater and plumbing, contact us today.